Baking with yeast is something which I didn’t like initially, but now I feel that I am addicted to it. Initially, without anyone’s help(obviously with only Internet) I baked pizza crust, which was my first baking experience with yeast. The result was not as expected and they ended up in bin. However, after continuous efforts involving wastage of some ingredients, I have now gained some level of mastery and now I’m brave enough to post this baking recipe with yeast.
Yes! After baking this white bread and seeing the final outcome, I couldn’t believe myself that it was me who baked it!!! I was pleased and excited!
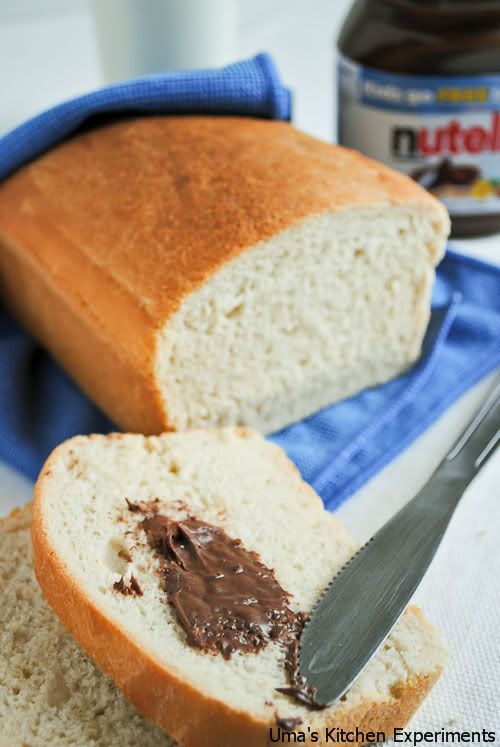
It is simple white bread with stepwise kneading instructions (If you own a kneading machine, kindly skip) for beginners who are absolutely new to yeast baking. Please refer here about yeast before you step into the recipe. I referred Rachel Allen’s Baking for the kneading instructions and I have blogged the same here.
Basic Information:
Preparation Time: 30 minutes
Idle Time: 2 hours
Cooking Time: 20-25 minutes
Makes: 1 loaf
Ingredients:
All purpose flour/ Plain flour/ Maida – 2 cups + extra for dusting
Warm water – 1/2 cup + extra to make soft dough
Active dry yeast – 1 envelope (7g)
Sugar – 2 teaspoons
Olive Oil/ Butter – 1 tablespoon + extra for greasing
Salt – 1/8 teaspoon
Method:
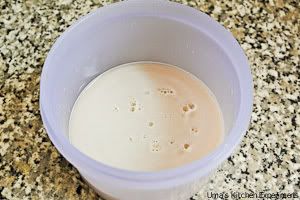
1) In a small bowl, mix sugar, yeast, 1/2 cup warm water and keep aside for 5-7 minutes till the water is frothy.
2) Meanwhile, sift the all purpose flour and add salt. Make a well in the centre of the flour and pour olive oil or butter. Start mixing using your hand which results flour mixture similar to breadcrumbs.
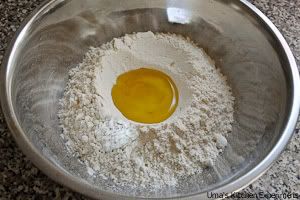
3) Add proved yeast to the flour mixture little at a time till you make a soft dough. Add extra warm water if required.

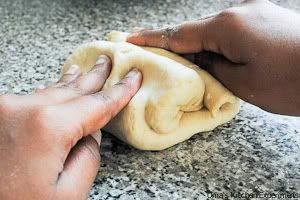
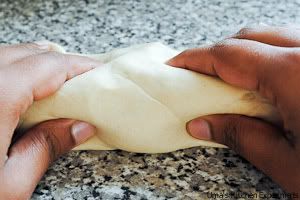
4) Now the kneading part. Knead it for 10 minutes by pushing the front of the dough away with the heel of your hand while holding the back of the dough as shown in picture.
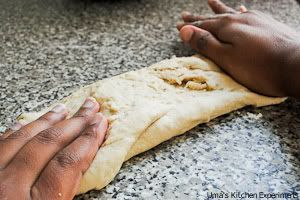
5) Then, fold the stretched part back on itself. Give a quarter turn and repeat the steps. If you own an electric mixer, you just require 3-5 minutes to do this job.
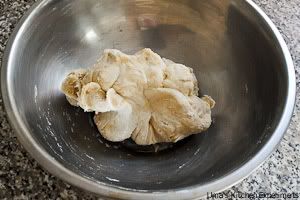
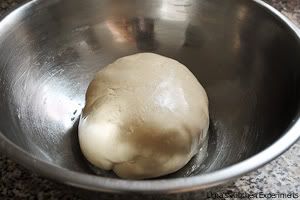
6) At the end, you get a smooth and soft elastic dough ball.

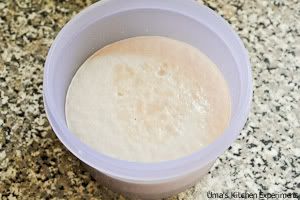
7) Coat it with oil and keep in a bowl greased with oil. Cover using a damp cloth/ cling wrap for an hour until the dough has doubled in its size. (Keep near warm stove/preheated oven/ inside the switched off the oven with turning the light on).

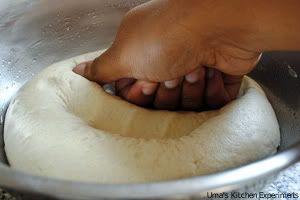
8) When the dough has risen, punch it back using your fist. Transfer the dough to the lightly floured surface.
9) Knead it for 2-3 minutes then allow to rest again for 10 minutes. Use cling wrap to cover this.
10) Preheat the oven for 220C(425F).
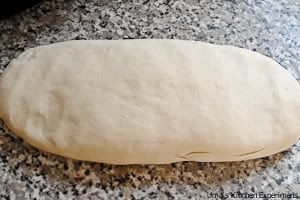
11) Shape the dough into oval and place inside the loaf tin(2lb, 25CM X 12CM). Cover using the damp cloth/cling wrap and keep near the warm place.
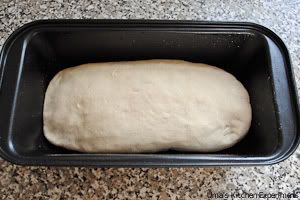
12) Allow it for final raising say about for 30-40 minutes. (It might differ based on the place where you keep the loaf tin for rising. Most of the time, it is less than an hour. but make sure not to over prove, otherwise the bread will deflate.)
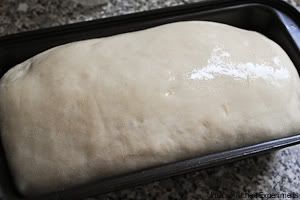
13) Slightly touch the bread surface using your finger. It should be soft and spring back slowly.If so, the dough is ready for baking.
14) Dust the top with flour or give a light coating of butter/oil/milk.
15) Bake it for 20-25 minutes or until the bread is well risen. After 15 minutes from the starting time, turn the oven temperature down to 200C(400F).
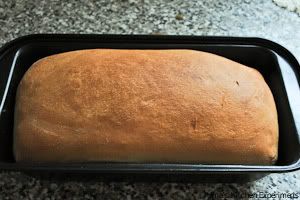
16) Turn out immediately after cooking. Otherwise the base part will be soggy.
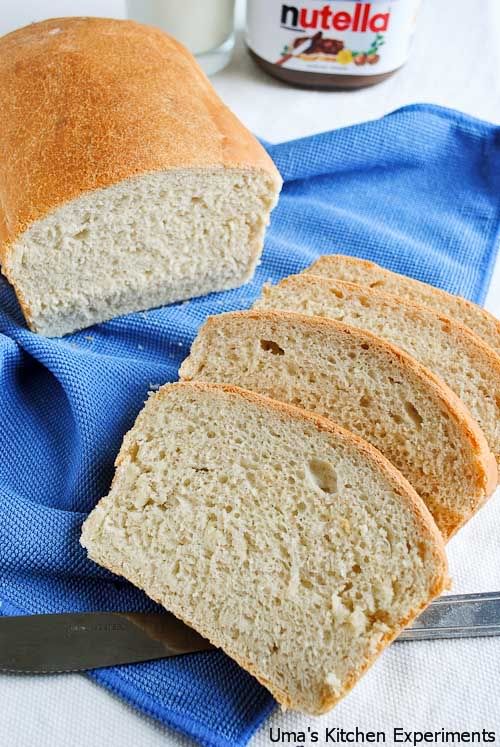
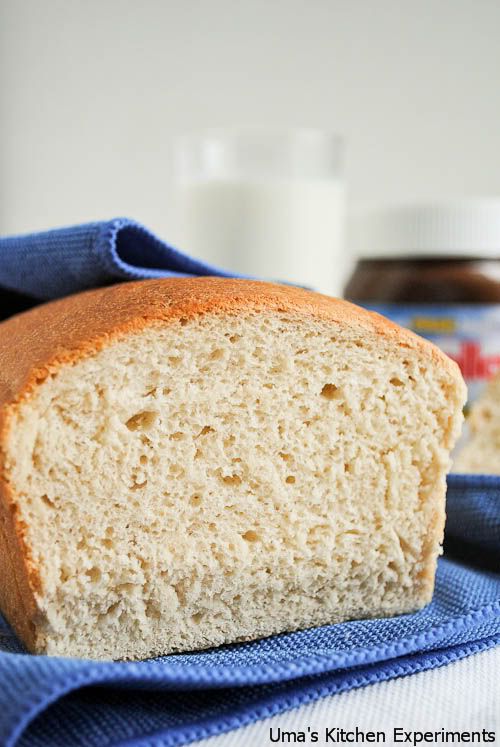
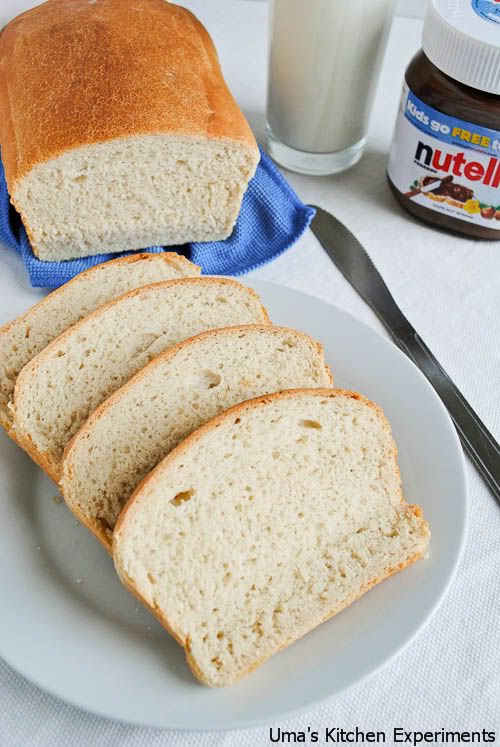
17) Cool on a wire rock. Once done, cover using a clean towel and store it.
18) Serve with butter or jam or nutella.
Note:
1) Use tray with water/ ice cubes to provide steaming for breads to get soft brown outside crust.
2) The raising time might differ and depends on the temperature on the room.
3) Yeast proofing is optional for active dry yeast. However spending an extra 5 minutes will help you to avoid using old/expired yeast in bread baking.


Simple yet delicious looking white bread. Great preparation.
Deepa
Hamaree Rasoi
delicious recipe… bookmarked..
Awesome recipe and great tips…
hi uma, great … i can learn make basic white bread from you, the ones in the shops are not soft.
Wishing you and your family a very Happy New Year..may all your good wishes come true..happy holidays
ooh la la- a perfect loaf ! have a great 2012
Happy new year.. n this is so perfectly baked..
ur bread has come perfect..thanks for the step by step pics
Indeed this looks like a perfect loaf of bread.Thanks for sharing.
Wow..Perfect Bread loaf,uma..I luv breads..Happy new year 2012
wow looks delicious and perfect …. Also A Very Happy new year …….
Perfectly baked bread….bookmarked to try
Perfect bake…looks too good
was searching for a bread recipe one like this…..bookmarked
wow ……..u have done it perfectly……………bookmarked
Happy New Year..
Perfectly baked n so soft too..
very delicious bread…looks super yummmmmm
Olá, passei para uma visitinha.
Pão caseiro é tudo de bom, ainda mais se for acompanhado com uma geleia de frutas.
Sua receita é tudo de bom mesmo!!!
Beijinhos.
Brasil
°º♫
°º✿
º° ✿♥ ♫° ·.
✿⊱╮
Perfectly baked..well done uma!!
This is a beautiful white bread and your photos are exquisite.
A pleasure to read about.
Moist and fresh loaf of bread.Happy 2012 Uma.
Happy new year wishes to u and ur family..Prefect looking white bread,well done Uma..
Wonderful Bake.Luv it Uma.Happy and Delish NewYear 2012!
If you Love Baking and Nigella, Check out my Giveaway at –
rookieqookie.com/2012/01/pineapple-zabaglione-with-whipped-cream.html
Wow…perfectly baked bread loaf…looks so soft n yummy…well done Uma!!
Wishing u a very happy n successful new year !!
Bread looks perfect! I felt the same way as you said when I baked the 1st bread! 🙂
Wish you a Very Happy New Year!